Introduction:
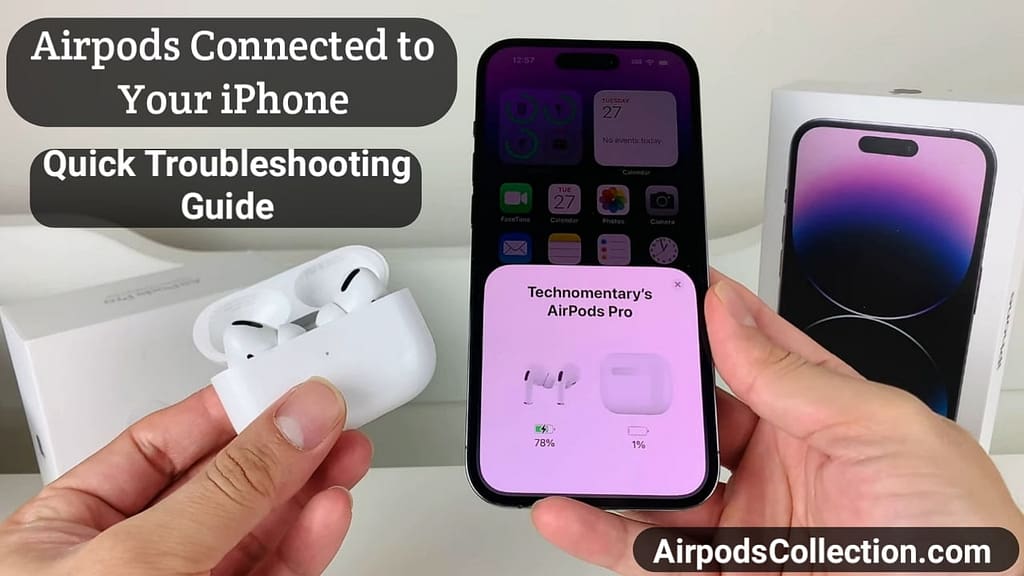
Having trouble connecting your AirPods to your iPhone 13? Worry not! I believe once your read this complete guide then you will not say that airpods won’t connect to iPhone 13 because This simple guide will help you identify the problem and get your music and calls flowing again.
Table of Contents
Airpods Won’t Connect to iPhone 13 – Troubleshooting Steps
| Steps | Description |
| 1 | Check AirPods Charge |
| 2 | Verify AirPods Turned On |
| 3 | Confirm Bluetooth Enabled |
| 4 | Update iPhone iOS |
| 5 | Select Correct AirPods Device |
| 6 | Reset AirPods Pairing |
Understanding the Problem:
Before diving into solutions, let’s first identify the possible culprits behind your AirPods connection woes. Here are some common reasons:
Airports Troubleshooting Guide:
1. Power Issues:
AirPods Not Charged:
Symptoms: Neither AirPod emits a charging light when placed in the case.
Solutions:
Check charging cable and power source: Ensure the charging cable is securely connected to both the charging case and a reliable power source, like a wall outlet or a computer USB port. Try using a different cable or power source if possible.
Clean charging contacts: Gently wipe the charging contacts on both the AirPods and the case with a lint-free cloth to remove any debris or dust that might be hindering proper contact.
Let the AirPods charge for an extended period: Sometimes, a depleted battery might require longer than usual to reach a sufficient charge level. Leave the AirPods in the charging case for at least 30 minutes undisturbed.
Check for case charging issues: Verify the charging case itself is holding a charge. If not, try charging the case with a different cable and power source.
Airpods Not Turned On:
Symptoms: AirPods don’t emit any sound even when placed in your ears.
Solutions:
Confirm manual power on: Open the charging case lid and press and hold the setup button on the back of the case for about 15 seconds until the status light flashes white. This manually turns on the AirPods.Check automatic ear detection: Ensure the automatic ear detection feature is enabled on your iPhone. Go to Settings > Bluetooth, tap the information icon next to your AirPods, and toggle on “Automatic Ear Detection.”
Reset the Airpods: If the above steps fail, try resetting your Airpods. With the case open, press and hold the setup button for about 15 seconds until the status light flashes white and then amber. This resets the Airpods and allows you to pair them again.
2. Connection Issues:
Bluetooth Disabled:
Symptoms: The Bluetooth icon on your iPhone is greyed out or the Bluetooth menu doesn’t appear.
Solutions:
Enable Bluetooth: Navigate to Settings > Bluetooth and ensure the toggle is green.
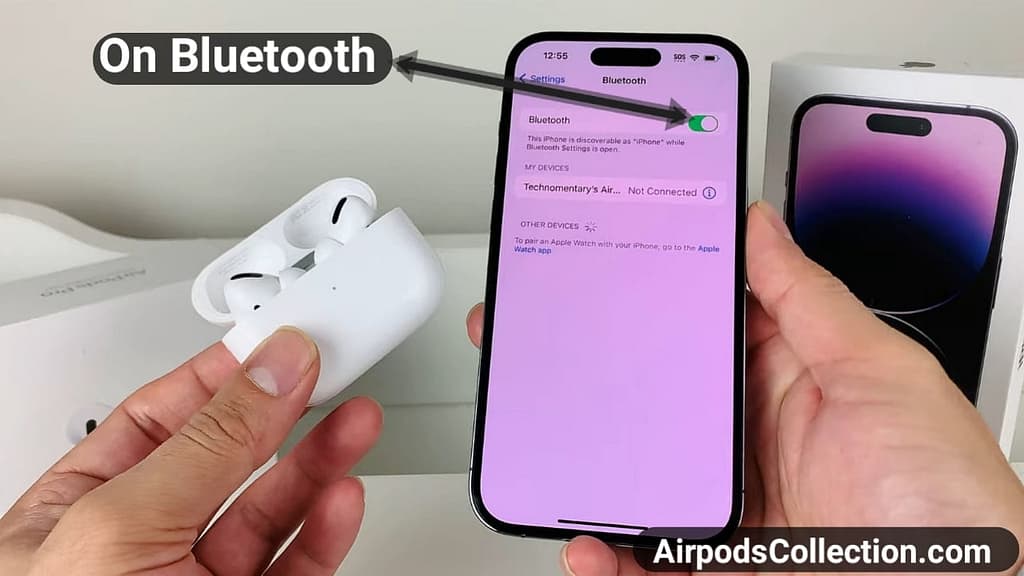
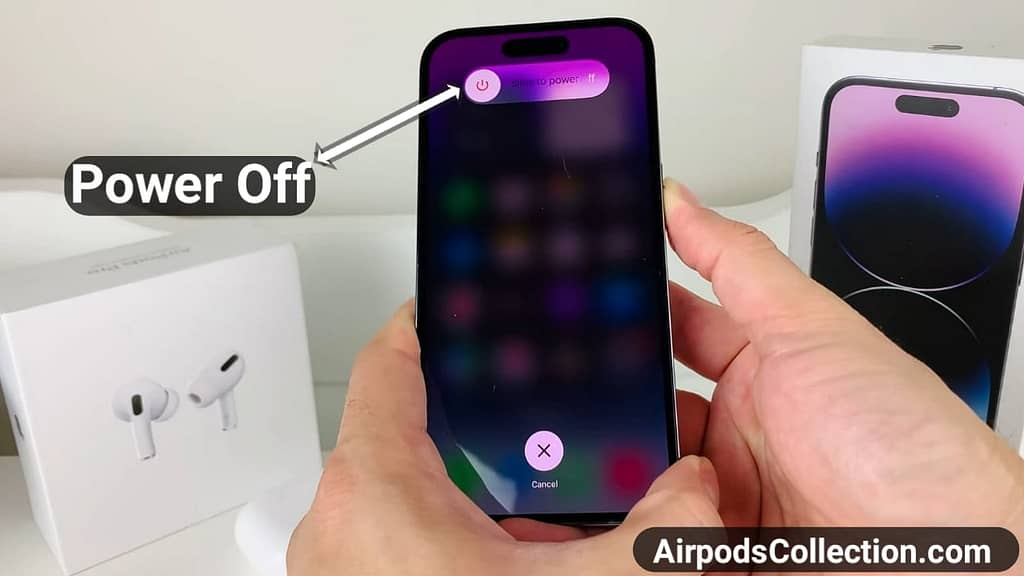
Restart Bluetooth: Turn Bluetooth off and on again, or simply turn your iPhone off and back on.
Check for Bluetooth interference: Certain electronic devices like microwave ovens or wireless routers can interfere with Bluetooth signals. Make an effort to get away from any possible interference sources.
Incompatible iOS Version:
Symptoms: Your iPhone displays an error message indicating incompatibility with your Airpods.
Solutions:
Update iOS: Download and install the latest iOS version available for your iPhone. Navigate to Settings > General > Software Update and comply to the instructions displayed on the screen..
Check minimum iOS requirement: Verify your Airpods model and ensure your iPhone meets the minimum iOS version required for proper functionality.This information is available on the Apple support web page.
Incorrect Connection:
Symptoms: Your iPhone displays several “AirPods” devices in the Bluetooth menu, and you’re unsure which one to select.
Solutions:
Identify the correct AirPods: Look for the AirPods device with the name you assigned to them. If you haven’t set a custom name, it should be something like “AirPods” followed by a unique identifier.
Forget and reconnect: If unsure, forget the currently connected AirPods device from your iPhone and then re-pair them by opening the charging case lid and holding the setup button until the status light flashes white. Then, select the correct AirPods from your iPhone’s Bluetooth menu.
AirPods Pairing Issues:
Symptoms: Your iPhone shows the AirPods as connected, but you still don’t hear any audio.
Solutions:
Force-quit Bluetooth: Open the App Switcher by swiping up from the bottom of your iPhone screen (or double-pressing the Home button if using an older model). Locate the Bluetooth app card and swipe it upwards to force-quit it. Then, re-enable Bluetooth.
Reset network settings: Go to Settings > General > Reset > Reset Network Settings. This will erase all your saved Wi-Fi passwords and Bluetooth connections, requiring you to re-enter them later.
Contact Apple Support: If none of the above solutions work, Contact Apple Support for further assistance. They might be able to diagnose and fix the issue remotely, or they might recommend sending your AirPods for repair.
Remember:These are just some of the most common causes and solutions for AirPods not connecting to an iPhone 13. The specific cause and solution for your individual case might differ based on your unique situation and device
Remember:
These are just some of the most common causes and solutions for AirPods not connecting to an iPhone 13. The specific cause and solution for your individual case might differ based on your unique situation and device
Additional Tips:
- Avoid placing your iPhone or AirPods near strong magnetic fields or wireless charging devices, as these can interfere with the connection.
- If you own multiple Bluetooth devices, ensure only the desired device is paired and selected on your iPhone.
- Consider using a different charging cable or charger to rule out potential power delivery issues.
- By systematically implementing these troubleshooting strategies, you should be able to conquer your AirPods connection woes and restore your audio enjoyment on your iPhone 13.
Remember, if the problem persists even after trying all the solutions, don’t hesitate to contact Apple Support for further assistance.
How to update iOS with cellular data
Keeping your iPhone iOS Software updated is crucial for maintaining its security, performance, and access to the latest features. While Wi-Fi is the preferred method for updates, you can use your cellular data if needed. However, it’s important to be mindful of data consumption and potential charges.
Things to Consider Before Updating iOS version with Cellular Data:
Data usage: Downloading updates can consume significant data, depending on the size of the update and your cellular data plan. Consider your data allowance and potential charges before proceeding.
Connectivity stability: Ensure a strong and stable cellular connection throughout the download process. Interruptions can lead to incomplete updates or data loss.
Battery level: Downloading updates can drain your battery. Consider plugging your iPhone into a power source before proceeding.
Steps to Update Your iPhone iOS Software version with Cellular Data:
- Connect to a cellular network: Ensure your iPhone is connected to a cellular network with sufficient data allowance.
- Go to Settings: Get your iPhone’s “Settings” app open.
- Navigate to General: Tap on “General.”
- Access Software Update: Select “Software Update.”
- Download and Install: Tap “Download and Install.”
- Review and Confirm: Review the update details and confirm your agreement to the terms and conditions.
- Start Downloading: The update will download and install automatically. On the screen, you may monitor the progress.
Pro Tips:
- Enable automatic updates over Wi-Fi: This ensures your iPhone updates automatically when connected to Wi-Fi, saving you data and battery life.
- Check for updates before leaving Wi-Fi: If you’re about to leave a Wi-Fi zone and may need to use cellular data, check for updates beforehand and download them while connected to Wi-Fi.
- Monitor data usage during downloads: Use your iPhone’s built-in data usage tracker to monitor data consumption throughout the update process.
By following these steps and tips, you can safely and efficiently update your iPhone using your cellular data. Remember to prioritize Wi-Fi updates whenever possible to minimize data usage and potential charges.
Unpairing your airpods from another device: A Simple Guide
Sometimes, you might need to unpair your beloved Airpods from all other devices for various reasons, like giving them away or troubleshooting connectivity issues. Here’s a quick and easy guide to achieving this:
1. Unpair from Individual Devices:
iOS: Go to Settings > Bluetooth on your iPhone or iPad. Locate your Airpods in the list, tap the “i” icon beside their name, and select “Forget This Device.”
Mac: Go to System Preferences > Bluetooth. Locate your Airpods in the list, click the “x” next to their name, and confirm by clicking “Forget Device.”
Apple Watch: Open the Settings app on your watch. Tap “Bluetooth.” Find your Airpods in the list, tap the “i” icon, and select “Forget Device.”
2. Resetting Your Airpods:
Place your Airpods in their charging case.Shut the lid and give it a half-minute.Open the lid and press and hold the setup button on the back of the case for about 15 seconds, until the status light flashes amber and then white.Your Airpods are now reset and unpaired from all devices.
3. Pairing Again:
Open the charging case of your Airpods near your desired device.On your device, look for the Airpods in the Bluetooth settings and tap to connect.
Proceed with any further instructions displayed on your smartphone to finish pairing.
Remember: Resetting your Airpods will erase all saved settings, including custom EQ and noise cancellation preferences. You’ll need to set them up again on all your devices.With these simple steps, you can easily unpair your Airpods from all devices and start afresh with your audio experience.
How to reset airpods from previous owner
Resetting Airpods from a Previous Owner
Erasing the Past: Resetting Airpods from a Previous Owner Bought used Airpods and need to start fresh? Don’t worry, wiping the slate clean is easy! Here’s how to reset your Airpods:
What You’ll Need:
Your Airpods and charging caseThe previous owner’s iPhone or another device paired with the Airpods (recommended)
Follow The Simple Steps and Reset Your Airpods:
1. Unpair from Previous Device (Recommended):
- If you can access the previous owner’s iPhone, navigate to “Settings” > “Bluetooth.”
- Locate your Airpods in the list and tap the “i” icon beside their name.
- Select “Forget This Device” to unpair them.
2. Reset Your Airpods:
- Place both Airpods in the charging case.
- Wait 30 seconds after closing the lid.
- Press and hold the setup button on the back of the case for approximately 15 seconds after opening the lid.
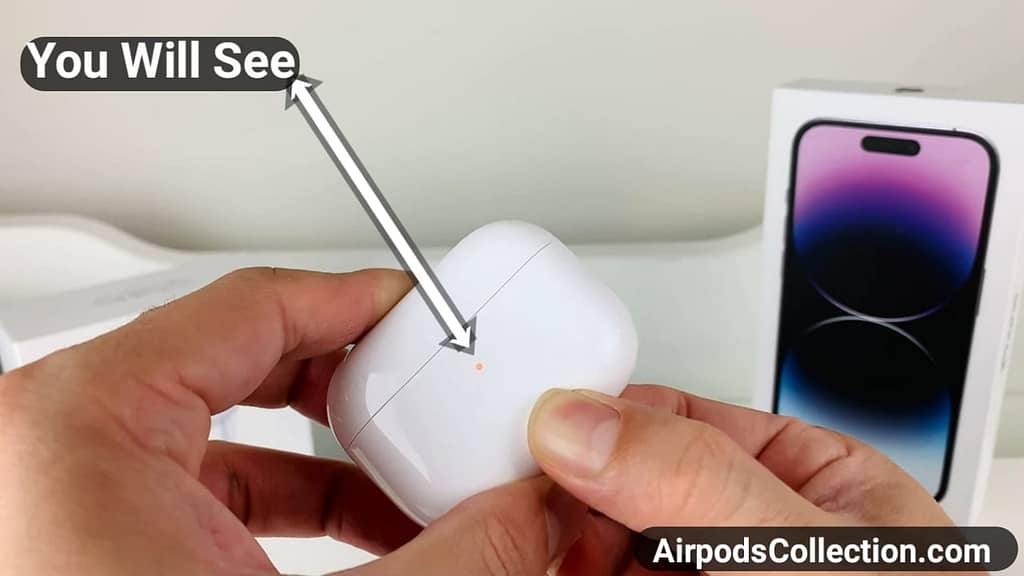
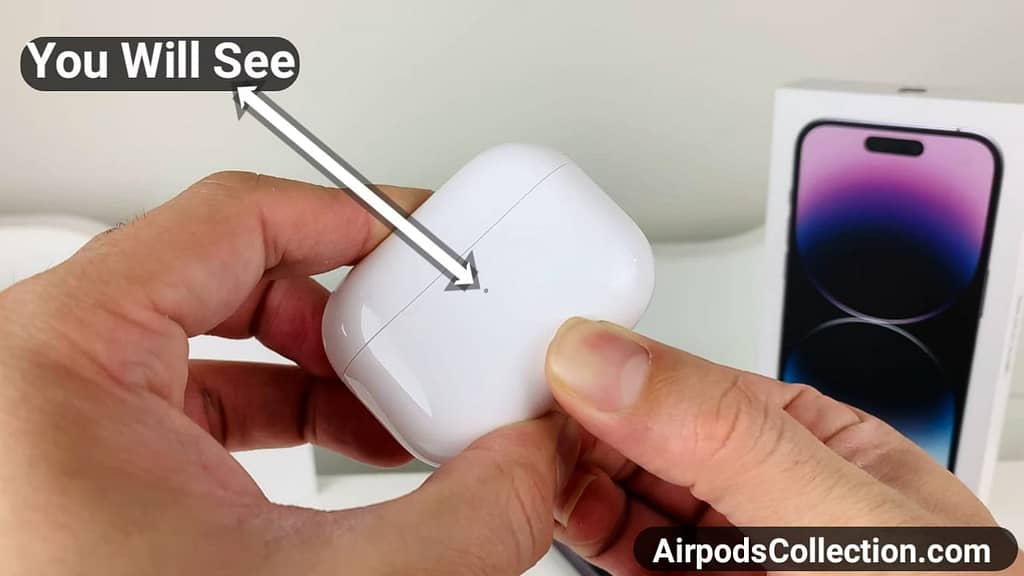
- The status light will flash amber and then white, indicating the reset is complete.
3. Re-pair with Your Device:
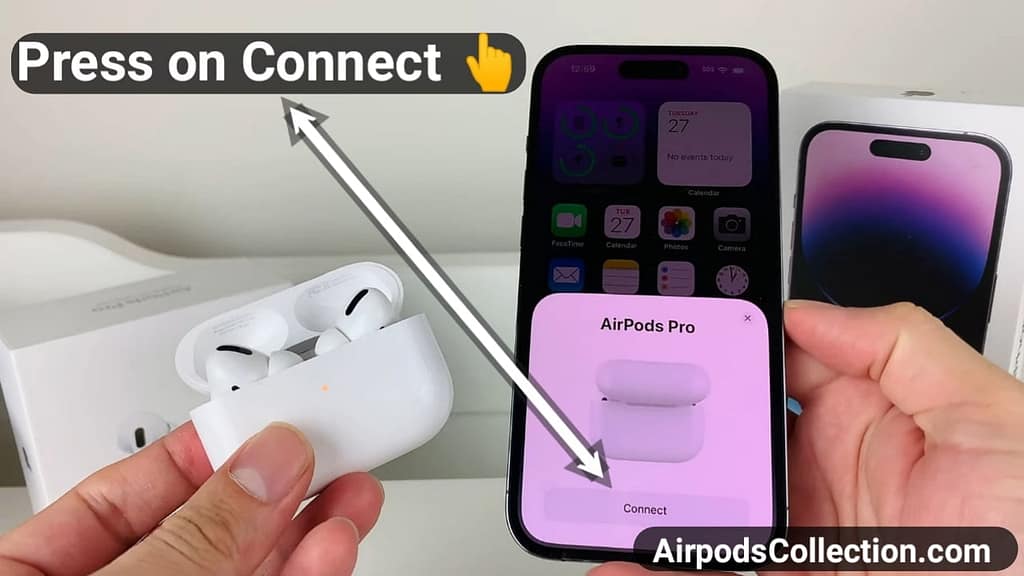
- Open the charging case near your desired device.
- Look for the Airpods in the Bluetooth settings and tap to connect.
- Continue with any further steps displayed on your mobile device to complete the pairing.
Additional Notes:
Resetting your Airpods will erase all settings, including custom EQ, noise cancellation preferences, and paired device information.
Note: You’ll need to re-pair your Airpods to your device after resetting.
Tip: If you don’t have access to the previous owner’s device, you can still reset your Airpods by following steps 2 and 3. However, the Airpods might remain connected to the previous owner’s Find My network, which could cause problems if they try to use them again. In these situations, get in touch with Apple Support for more help.
Now your Airpods are free from the previous owner’s settings and ready to be paired with your devices and create new listening experiences.
Conclusion
Today it’s not impossible that Airpods Won’t Connect to iPhone 13 so no need for frustration, these tips will get your music flowing again:
Power up: Charge your Airpods and ensure Bluetooth is on.
Check settings: Update your iPhone, forget and re-add the Airpods, and check for software glitches.
Reset and reconnect: If all else fails, a quick reset will give your Airpods a fresh start.
With a little detective work and these handy tips, your Airpods and iPhone will be singing in harmony again in no time.
Happy listening!
FAQS
My Airpods won’t connect to my iPhone 13. What should I do?
Check several things:Charge: Ensure both Airpods are fully charged.
Power: Verify Bluetooth is enabled on your iPhone.
Pairing: Make sure you’re selecting the correct Airpods in your Bluetooth settings.
Reset: Try resetting your Airpods by holding the setup button on the case for 15 seconds.
Additional tips: Install the most recent iOS version for your iPhone.Both the casing and the AirPods’ charging contacts should be cleaned.Restart your iPhone.
Why should I Reset my Airpods?
Resetting your Airpods can help resolve various issues, such as: Persistent connection problems, Software glitches, Preparing them for a new owner, Troubleshooting pairing issues.
I bought used Airpods. How do I remove the previous owner’s settings?
Follow these steps:Ideally, unpair them from the previous owner’s iPhone first. Then, reset your Airpods by holding the setup button for 15 seconds. Finally, re-pair them with your device.
What happens when I reset my Airpods?
Resetting erases all settings, including:Custom EQ and noise cancellation preferences. Paired device information.
They will need to be reconfigured from the beginning.
Bonus Tip: Enable automatic updates over Wi-Fi to ensure your Airpods stay current without manual intervention.
Why My Airpods keep disconnecting?
Make sure you’re not experiencing interference from other Bluetooth devices. Check if your Airpods are near strong Wi-Fi signals or microwave ovens. Try resetting your Airpods to factory settings.
Why Only one Airpod is working?
Make sure both Airpods are clean and free of debris. Ensure both Airpods are properly seated in the charging case. Try resetting your Airpods to factory settings.
How do I forget my Airpods from my device?
On your iPhone/iPad: Go to Settings > Bluetooth, tap the “i” icon next to your Airpods, and select “Forget This Device.”
On your Mac: Go to System Preferences > Bluetooth, click the “x” next to your Airpods, and confirm by clicking “Forget Device.”
What are the reasons my Airpods won’t connect to my iPhone 13?
This could be due to various factors like insufficient charge, AirPods not turned on, disabled Bluetooth, incompatible iOS version, incorrect connection, or pairing issues.
Should I update my iPhone to fix Airpods connection problems?
Yes, updating your iPhone to the latest iOS version can improve compatibility and potentially resolve connection issues.
Do I Need an iPhone to Reset my Airpods?
No, you can also reset them using a Mac or iPad with Bluetooth connectivity.
My Airpods turn off automatically. How do I fix it?
Check the Auto-Off Ear Detection settings and adjust them as needed. Try resetting your Airpods if the problem continues.
Do I Need to Re-Pair my Airpods after Resetting Them?
Yes, you’ll need to re-pair your Airpods to all your devices after each reset.
May Be You Want to Read This Also:
- How to Find Airpods Case Without Airpods.
- How Much Does It Cost to Replace a lost AirPod Case
- Why is One Airpod Quieter Than The Other Even After Cleaning
- Airpods Popup Not Showing on iphone
- How to Know if AirPods Max are Charging 2024
- Why AirPods Max Not Charging
- AirPods Max Connected But No Sound 2024
- How Do You Find AirPods If They Are In The Charging Case
- 6 Ways How to Remove Water From Airpods

Top 3 Easy Solutions: How To Clean Airpods For Better Sound
Introduction: Keeping the Beat Crisp: A Guide to Cleaning Your AirPods for Optimal Sound if you don’t know How to Clean Airpods for Better Sound so it will be Helpful for You. AirPods …

7 Easy Solutions: Why Are My Airpods So Quiet on Full Volume
Introduction: If you are still struggling with the Quiet Airpods Problem and till now you don’t get the solution and you don’t know Why Are My Airpods So Quiet on Full Volume, so …

Airpod Pro Max Not Playing Sound (All Problem Solved) 2024
Introductions: Are you Facing the frustration of your AirPods Max problem which is appearing connected but refusing to play any sound? and you don’t know why airpod pro max not playing sound Worry …

Why Airpod pro Max not Charging no Light: Reasons and Easy Solutions
Introduction: Are you Facing a situation where your AirPods Max refuse to charge, with no light to indicate the process, can be frustrating, specially when you don’t know why airpod pro max not …

6 Ways How to Remove Water From Airpods
Introduction: If unfortunately your AirPods have gotten wet and you don’t know about 6 ways How to Remove Water From Airpods so worry not here is the ultimate solutions to remove water from …

How Do You Find AirPods If They Are In The Charging Case
Introduction: Losing your AirPods can be a frustrating and inconvenient experience, especially when you don’t know How Do You Find AirPods If They Are In The Charging Case. But fear not, music lovers! …


